After 15 years of doing tie dye
t-shirts with my kinders and second graders, I can officially say I have it down
to a science! Each year, I still make my own shirt and currently have more
shirts than someone over the age of 10 should have. If you are taking on the task of tie dye, read
below and I hope these tips help you!
I usually have 2-3 parent volunteers
help out- although it’s not necessary, you’ll want them for your sanity.
What I’ve learned:
- I always use the Jacquard kits and even though they say it makes 15 shirts, I always buy between 2-3 kits (for 25 shirts) otherwise we run out of dye. If you use the 40% coupon found at most craft stores, they aren’t too expensive and the kits can be found online as well.
- Even though the kit comes with gloves and rubber bands, I always pick up dishwashing gloves and rubber bands at the dollar store because the gloves cover a lot more and the rubber bands are easier for the kids to stretch around the shirt. You'll need about 3-4 rubber bands per shirt.
So here it
goes…
You’ll need the following supplies:
You will need 2-3 Jacquard Tie Dye Kits from A.C. MOORE, Micheals or any
other craft store.
1 set of dishwashing gloves for each volunteer. *Even though they have gloves in the
kit, you’ll be happier and cleaner with these!
1 large
plastic tablecloth to go over the table.
3-4 large
aluminum trays (ex. lasagna/roasting size)
1 bag of
rubber bands
1 container
baby wipes
1 roll of
paper towels
Ziploc bags (labeled with child's name) * get the real-deal- the cheaper versions might not seal well.
Prior to tie-dyeing:
You’ll need to size up your kids for
the t-shirts. I always go bigger since
the shirts are 100% cotton and they’ll want to wear them next year (my 2nd
graders got mostly larges with a few mediums).
I buy the 100% cotton (very important)
Hanes undershirts as they always hold the colors the best.
Put the child’s name on the inside
collar with a sharpie prior to soaking in the soda ash.
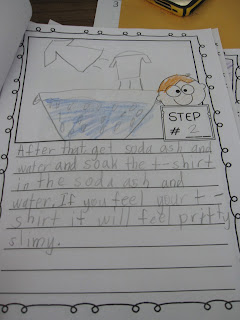
Next, send home the t-shirts and the
soda ash (from the kit) with a parent (or do it yourself) to soak the t-shirts
for at least 20 minutes. I always leave it in longer. Wring them out and bring
them back to school damp. They will feel a bit slimy.
For tie-dyeing:
I mix the dye colors with very warm/hot
water and shake them up quite well (they’ll cool down while the kids are
twisting the shirts). Sometimes the
nozzle gets clogged, so keep a paper clip handy to unclog it. The DVD is great to watch if you've never done it before.
I partner up my kids- one kid will
twist the shirt and the other is responsible for opening up the rubber bands
for them to put around their shirt. Make
sure the table you twist the shirt on is really clean! Any marker residue will go on your shirt. The
kit has a great video on the different styles- spiral, bullseye, etc.
We do the 'pinch and twist' technique.
Squish the ends in.
I usually make sure their name is visible to make it easier when I call them to dye it.
We use three rubber bands to hold it in place. We make a 'plus sign' with the first two and add another one diagonally.
I usually have all the kids twist and rubber
band their shirts and then work on an activity until I call them one at a time
to dye their shirts.
Next, put the tablecloth on the table, put the shirt in the lasagna
tray and have the child apply the dye.
Make sure the dye goes into the shirt, as well as on the outside, otherwise you will have a white middle. It's a great time to discuss how to create other colors such as green, orange and purple.
Make sure you do NOT squeeze/wring the shirt as
the dyes will combine and make a lovely brown =( We do one side and flip the shirt over to do
the other. Put the shirt in a labeled Ziploc and put to the side.
Clean the tray after EACH shirt with a paper towel or wet wipe. If you don’t, the dyes will pool and ruin the next
shirt.
No matter how you apply the dye, each
shirt will come out unique and fabulous!!
I send home instructions (they are in the kit) with the parents so they
can wash them. They need to wait 24 hours before washing them!
We wear our shirts on class trips and for class events- they look great! Here are some shirts we've made.
The next day I have my kids complete the How to
Make a Tie Dye Shirt packet. We brainstorm what we did and try to make it into 6 steps. They did a great job using their temporal words. Grab your own How to Packet for FREE here. If you found this helpful for creating your own shirts, please let me know!


